November 9, 2017

, , ,

Cross Nativity Design Space Cut File

A couple of weeks back someone in the group posted a picture of a wooden cross that was made up of scenes from the nativity. The person wanted to know if there was an SVG file for the cross. I said I doubted because the cross was most likely a template for a scroll saw. Then I thought "What a fun challenge! I'll use ALL Design Space images to design one." Hours later I had it done, but the app was not saving it. So, a few days later after there was an update for the app to fix the issue I was having of not being able to save, I started all over and was finally able to save the file! YAY!! Hours of work in this image right here. The images are from the Cricut Access* exclusive Dimensional Scenes- Nativity. So, if you don't have Cricut Access*, you won't be able to cut the file.

I hope to see what you make with this image.

And!! Don't forget to follow my blog and/or follow me via email. That way you don't miss out on any of my files I upload to my blog. :)

Design Space File - Click Here to Download

November 2, 2017

, ,

Storybook Glass Block Cricut Design Space Cutting Files

Today I'am sharing four glass block Design Space cutting files that I designed using images from Cricut Access*. The images were originally bookmarks. They are currently sized to 7½ by 7½ inches, and can be resized to any square size if need be.

Design Space Files:

Treasure Island & Moby Dick - Download
Pride & Prejudice - Download
The Secret Garden - Download
Alice in Wonderland & Peter Pan - Download

October 30, 2017

, , , , ,

Christmas 3D Cactus Mason Jar Ornament - Dollar Tree

October 25, 2017

, , , , ,

Stained Glass Window Baby Jesus, Mary and Joseph Glass Block - Cricut Design Space Cut File

Stained glass window of baby Jesus, Mary and Joseph designed for a glass block, but can be cut for a card. It's designed using ALL Cricut images. If you don't have the subscription to Cricut Access*

If you like my Design Space files and would like email updates so you don't miss a file release, please follow my blog by clicking here: Follow Jooniper's Blog YAY!!

Design Space Cut File: Click Here to Download

October 18, 2017

, , , ,

Christmas Night Santa Silhouette Design Space Cut File


I designed this Christmas night silhouette to go on a glass block. The image is already sized to 7½ by 7½ inches to hopefully fit on an 8 by 8 inch glass block. This is a Design Space cut file designed using ALL Cricut images and a Cricut Access Exclusive font. If you don't have the subscription to Cricut Access* you will need the cartridge Christmas* to be able to cut the image out.

Design Space Cut File Link: Click Here to Download


If you use this image I'd love to see what you did with it. You can find me in the Facebook group Cricut Explore and More.

October 1, 2017

New Writing Fonts in Cricut Design Space

I noticed the other day that Cricut has added some more Has a Writing Style fonts to Design Space. The writing fonts pictured are INCLUDED in the Cricut Access subscription. Cricut Access has over 110 writing style fonts. They have a very nice variety that includes script fonts, cute fonts, and even themed fonts. I like to use writing fonts as my sentiments on my cards and tags. I dont own many sentiment stamps so the writing fonts are great for my projects.  Has a Writing Style Cricut fonts are the ONLY fonts that write with a single line and not with a bubble outline. If you don't have the Cricut Access Subscription* subscribing just for the writing fonts is SO worth it! 

August 29, 2017

, , ,

You're the Jelly to My Peanut Butter Card - KaDoodle Bug Designs


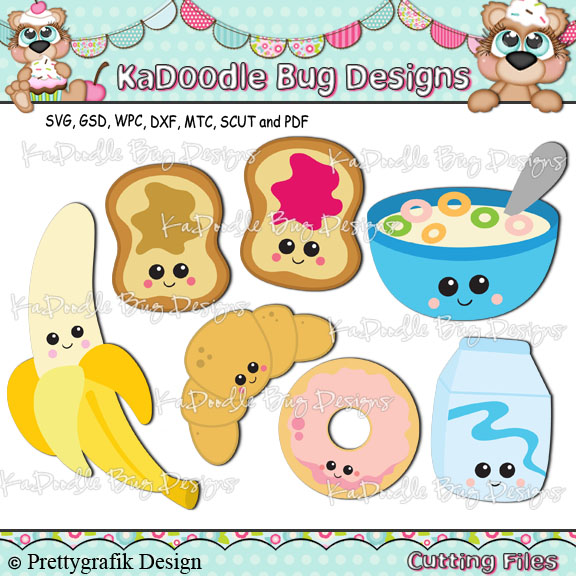
I think my Design Team project for KaDoodle Bug Designs turned out totally cute! The PB & J sandwich images are from KaDoodle Bug Design's image set Cutesy Kids Breakfast.

The sentiment was written with my Explore Air 2 using the Cricut writing font Kyden and a Ranger Perfect Medium embossing pen - bullet tip. I then sprinkled Midnight Black Stampendous embossing powder and then heat set it with my heat gun. Who needs stamps when you have a Cricut Explore machine that can write your sentiments for you with an embossing pen.

For the pieces of bread I used Distress Ink Gathered Twigs to ink the edges using the Mini Ink Blending Tool. For the peanut butter I used Tim Holtz Metallic Kraft cardstock in copper. For the jelly I used Core'dinations Glitter Silk cardstock in purple. The pink hearts have a shimmer from using a Spectrum Noir Sparkle Clear Overlay pen. It's hard to see in the picture, but really shimmery in real life.

Thanks for visiting!


August 2, 2017

, , ,

Bunny Cupcake Birthday Card - KDB


Today's card was made using a KaDoodle Bug Designs SVG file called Bunny Cupcake. It was pretty easy to put together. I had cut all the cupcake pieces from white watercolor paper and then I used Distress Inks and a water brush to color in the pieces. Once it dried I assembled the cupcake layers and used white Gelly Roll pen to add highlights. The bunny pieces were cut from Neenah shimmer cardstock and I wanted my bunny to looks "dirty" so I used Hickory Smoke Distress Ink and my water brush to go around the edges of the bunny pieces. The sentiment was written by the Explore Air 2 on a scrap piece of paper I did some Distress Ink technique on a few months back. See... don't throw away your "mistakes", you can always use them on other projects.

What I Used:
~ KaDoodle Bug Designs SVG file - Bunny Cupake
~ Distress Inks - Ripe Persimmons, Festive Berries, Cracked Pistachio, Mermaid Lagoon, Worn Lipstick, and Hickory Smoke.
~ Gelly Roll pen - white

July 7, 2017

, , ,

Wonderful News! Coffee Skunk Card - KaDoodle Bug Designs + DS Card Base Cut File


I have some wonderful news I want to share! I'am now on the Design Team for Kadoodle Bug Designs! YAY! For my first Design Team project I created this uber cute coffee skunk card. You can get this cute coffee skunk SVG file here. The card is REALLY shimmery and sparkly in real life. I used black and white shimmer cardstock and turquoise shimmer cardstock, with a hint of gold foil cardstock. All the layers are pop dotted and inked. The background is cut from Cricut black glitter cardstock.

The rest of the card was designed using images from Cricut Access. You can download the Design Space file for the card base below.

Design Space A2 Card Base Cut File Link: Click Here to Download
July 3, 2017

, , ,

Card Sketch #3 - Cute Hedgehog Card Design Space Cut File

For this card sketch I used a cute little hedgehog image that I found in Cricut Access. The hedgehog can be found on the Live Simply cartridge. As always my card sketches are free to cut because I use all free basic shapes, so no Cricut Access subscription required to cut the card sketch imaged to the right.

The hedgehog is on an Action Wobble. He will wiggle from side to side. If you don't know where to get Action Wobbles you can be buy them everywhere including Blisty.

You can download the Design Space file on my Card Sketch page.

Thanks for stopping by!

March 20, 2017

, , , ,

Thank You Write then Cut Heat Embossed Card - Design Space Cut File

I got my new Cricut Explore Air 2 today!! YAY!! I wanted to try out the 2x faster write and cut features, so I designed this file using a writing file from Cricut Access subscription and used the Perfect Medium embossing pen so I could heat emboss the writing. Worked out great!

The Thank You background was written by the Explore Air 2 on fast mode using a Perfect Medium embossing pen and then snow white embossing powder that was heat set with a heat gun. The embossing ink stayed wet long enough that none of it dried before I got around to heat embossing. I used Crack Pistachio Distress Ink to help bring out the white embossed Thank Yous. Then I spritzed water on it to get the distressed water look.

Design Space Cut File Link: Click Here to Download


, , ,

Meow! That's Cat for Hi! Card - Design Space Cut File

Today's card is a super cute quick and easy card that uses up scraps. This Design Space cut file was designed using all Cricut images and font that is available in the Cricut Access subscription.

I like cats, so my card is cat themed. I have many, many cats and they always greet us by meowing at us when we come home. They are all lovely lil souls and make me happy (most times - HA!).

On to the card details, enough about my hoard of kitties! HA!!


For this card you will need 2 1/2 inch by 5 inch pieces of scraps in 3 different colors and/or patterned paper, these will be for the colors of the cat cutouts. 3 squares will be cut from each of those scrap pieces for a total of 9 squares. You will then glue those squares to the back of the top layer that has the cat cutouts. The squares are arranged in any way that is pleasing to your eye. You can make it the same pattern in all rows or mix them up like I did on mine, there's no wrong way. Once you have figured out your arrangement, you will glue one square in the upper left corner, flush on both sides of the top layer -- see picture -- and then you will do the same for the upper right corner, and then put the middle piece. Then for the bottom row you will have to do the same as the top row and line up with the lower right and left corners. The middle pieces might overlap the other 2 squares a bit, but that is fine. Just make sure that the other squares do not overlap pass the top layer from the front.

Thank you for visiting and I hope to see what you create with this file.

Design Space Cut File Link: Click Here to Download

March 16, 2017

, , ,

Mermaid Bear I Sea It's Your Birthday Card - Cricut Design Space File


Here's a super cute mermaid bear card I designed using all Cricut images that are included in the Cricut Access subscription. It's really bright, happy and sparkly in real life.

The cute pun sentiment is written by the Cricut Explore using a Perfect Medium embossing pen -- bullet tip -- and then heat embossed with snow white embossing powder. The Perfect Medium embossing pen is the best for this technique because the ink stays wet longer and saturates the cardstock meaning it will not dry before your sentiment is written and your image cut.

The mermaid bear's tail is really sparkly. I used teal shimmer cardstock and light grey shimmer cardstock. I pop dotted her shells and starfish. I think the colors work well together. The air bubbles are light teal shimmer cardstock.

I dry embossed the background using my Cuttlebug and the Darice polka dot embossing folder. I was hoping it looked like air bubbles. I then used foam mounting tape on the back to give it added dimension.

Design Space Cut File Link: Click Here to Download

If you would like to watch the assembly process video on my YouTube channel Click Here. Note: There is no sound. Be sure to subscribe to my YouTube channel to be notified of new videos.


March 10, 2017

, , ,

Card Sketch #2 - Design Space Cut File

I finally got around to another card sketch that I designed using ALL free shapes from Design Space. Which means NO subscription required to cut. The Design Space file DOES NOT include the flamingo sentiment. I downloaded the "Be a flamingo in a flock of pigeons" from Creative Fabrica's Craft subscription* and used Print Then Cut to make it my sentiment. They have a lot of nice files that can be used for vinyl or Print Then Cut and is ONLY $12 for 3 months!*

I think my card turned out nice. It's so hard to get photos of gold foil cardstock and black glitzy glitter cardstock. The background patterned paper looked tropical and the gold foil dots helped to jazz it up. And of course, it NEEDED glitter somewhere! So, I cut the sentiments shadow layer from black Glitzy glitter cardstock.

You can download the Design Space file on my Card Sketch page.

February 8, 2017

, , , ,

Card Sketch #1 - Design Space Cut File


Here is the first of, hopefully, many card sketch Design Space cut files. You can use the file as is or as your starting point to help spark your mojo. This is a Design Space cut file created using all FREE images, which means you DO NOT need Cricut Access to cut it. Above I have provided an example of how I used the card sketch. I think my card came out super cute. :)

You can download the Design Space file on my Card Sketch page.

January 26, 2017

,

Valentine's Day Heart Stand Candy Bowl


It's a cute Valentine's Day candy bowl. It could be used for more than just Valentine's Day. Use as a centerpiece for wedding tables or for birthday party candy station or table.

This was put together using items from the Dollar Tree. The heart shaped bowl, the candle stick, and the candies all from the Dollar Tree. I even used my Cricut Explore to embellish and make it more festive!

For the main piece I spray painted the glass candle stick holder with a nickle finish and then I used E6000 to glue the heart shaped glass bowl and the glass candle stick holder together. Super easy, and a nice display piece!

Then I spruced it up using my Cricut Explore. I used the font MF I Love Glitter font for the love that I cut out of metallic red vinyl and applied to the sides of the heart shaped glass bowl. Then I decided it needed a bow, and since I'm not good at tying bows I cut one of the 3D bows from Cricut Access. That bow turned out cute! To finish it off I cut a doily that had hearts. It's from Anna Griffin's Seasonal Soiree cartridge. 

It was a fast, easy project and looks very nice.


January 23, 2017

, ,

Jason - 2 of 2 Horror Movie Valentine's Day Cards - Cricut


Here's Jason! He's creepy cute! My 2nd favorite horror movies are the Friday the 13th movies. My favorite Friday the 13th movie is part 3.

The sentiment was the hardest to come up with. I did a lot of Google searching and finally found a sentiment that allowed me to add more detail to the card and make it my own. I added the little pink heart that looks like the machete ripped through it. It was a nice detail that went well with the sentiment. Sentiments are hard, especially when the card you are creating is unique. I like unique.

His mask is cut from Core'dinations Cardmaker Series Pearl Cardstock  - white; it's really shimmery in real life. I then inked the mask with Antique Linen Distress Ink to give it an aged, used look. To give added dimension I cut an extra layer of the mask and used Hide Contour to make it a solid blackout piece and used foam pop dots to make the mask 3D looking. It turned out great.

The background is embossed with a Cuttlebug embossing folder of Conversation Hearts Candies. Jason himself is pop dotted. The machete is cut from a metallic paper and pop dotted as well. Even the little heart is pop dotted. The larger red heart is pop dotted to give even more dimension to the card. Lots of foam pop dots used on this card. I LOVE pop dots!! HAHA!!

I hope you enjoyed this card as much as I enjoyed designing and putting it together.